The most basic form of campaign attribution is a first touch model, capturing a prospect’s lead source, or where they first started their journey when they interacted with one of your marketing campaigns. It answers the question, which channels are my leads coming from? However, marketing automation systems provide teams out-of-the-box with insight as to their first conversion point, but there is more setup involved when it comes to accurate lead source tracking, to capture the channel that drove the prospect to the conversion point in the first place.
This is challenging when marketers have multiple channels that they are using to drive traffic to their forms and landing pages. Especially when cookie tracking is becoming more and more phased out. To guarantee accurate lead source tracking, we recommend in our Ultimate Guide to Campaign Attribution, that teams use links with UTM parameters to pass the data through on their forms using hidden fields.
What are the five UTM parameters?
❶ Campaign – The name of the campaign.
❷ Medium – The type of campaign, for example, paid or organic.
❸ Source – The channel source, such as, LinkedIn or Facebook.
❹ Content – The variation, for example, ad variation A vs. ad variation B.
❺ Term – The paid keyword (if applicable).
UTM parameters can be attached on the end of a link that will drive traffic back to your form or landing pages. When prospects click on a link with UTM parameters and then submit to the form with hidden fields this data will be captured onto the prospect data record.
Using UTM Parameters with Attributable Links
There are two more that we recommend adding to your link if you are using Salesforce as your CRM which are Salesforce Campaign ID and Salesforce Campaign Status. This will help with adding the prospect as a campaign member to the campaign that drove them to convert in the first place.
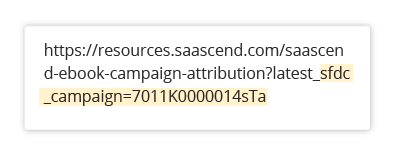
When the UTM parameters are added onto the end of a link they look like the below example (fig. 1). This link was taken from the SaaScend landing page used to download the Ultimate Guide to Campaign Attribution. This blog article was used as the source, so that the marketing team knows that it was this blog that drove the prospect to that page in the first place when they submit the form.
Original landing page link: https://resources.saascend.com/saascend-ebook-campaign-attribution
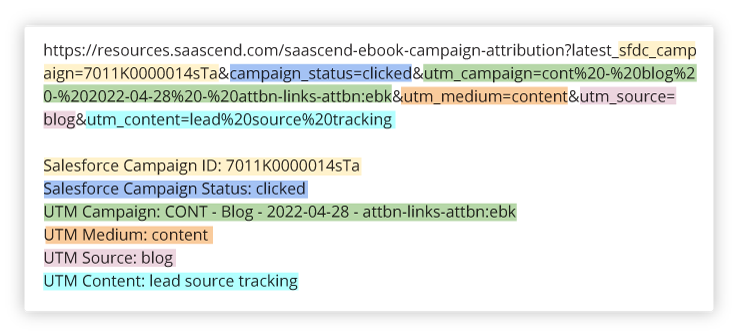
Figure 1, An example of a link with UTM parameters. Each part of the link is color coded to visually match with its corresponding UTM parameter.
It is not recommended to build these links manually as that is very tedious and time consuming. There are a few resources that you can use to help save your team’s time (fig. 2).
| Tool | Amount of Time | Scalability | Type |
| Campaign URL Builder by Google Analytics | 3 Minutes | Links are created one at a time. | Free |
| Automated Campaigns App by SaaScend | 30 Seconds | Links for multiple channels are created all at once. | Paid |
Capturing UTM Parameters with Hidden Fields
Links with UTM parameters are a great first step, but without the hidden fields on your forms to capture the data, none of it will pass through onto the prospect or contact record.
The first step will be to make sure that you have fields for each of the UTM parameters that you want to capture as well as for Salesforce Campaign ID and Campaign Member Status (if applicable) in your marketing automation platform and synced to your CRM.
Then you need to create hidden fields on all of your forms. Refer to the documentation for your respective marketing automation platform to use hidden fields on forms. For quick access, links to the relevant help articles have been included below.
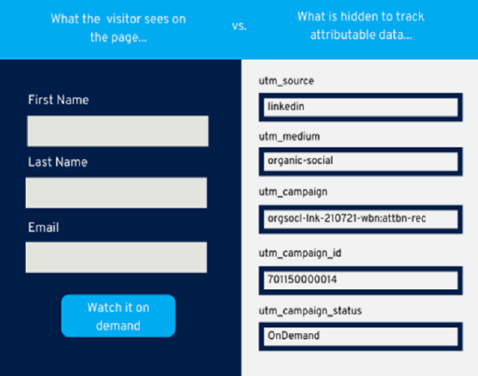
The image to the right is a demonstration of what the visitor sees on a form versus what is on the back end when hidden fields are used to capture UTM data when they submit to the form (fig. 3).
Figure 3
When using hidden fields on your forms, it is important to remember to NOT make them required. If a prospect was to submit to your form and they did not use one of your links and they have no data being passed through for those UTM fields, then it could cause an error when they submit, creating friction which would then most likely result in them not converting.
Using Automation for Lead Source Tracking
Once links with UTM parameters are being used and are passing through data using hidden fields on forms, the next steps will be to update a prospect’s lead source.
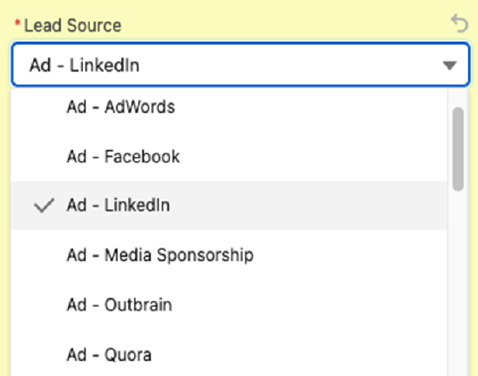
Using automation in your marketing automation platform or your CRM, you can create processes that evaluate what the value is for the UTM source field when a prospect submits to a form. Then update their Lead Source field if the value is null, to the UTM source field value provided. For example, prospects that come from a LinkedIn Ad that do not currently have a value for their source field will have their Lead Source field updated to Ad – LinkedIn.
The execution for setting up the automation varies depending on your system but the logic for this would be:
The Lead Source field in Salesforce being updated to the picklist value, Ad – LinkedIn.
If the prospect field: Lead Source: is: empty
AND
The prospect field: UTM Source: equals: LinkedIn
THEN
Update prospect field: Lead Source: to: Ad-LinkedIn
Automatically updating the Lead Source value according to the UTM source field data, assists with having a more accurate depiction of where your leads are coming from.
Achieving Campaign Attribution
As previously mentioned, the whole goal of putting all of these tracking mechanisms in place is to be able to attribute influenced revenue back to your promotional channels that drove prospects to convert on your form or landing page in the first place. Updating the lead source on a lead or contact record, does not not make this happen. There needs to be further configuration. If Salesforce is your CRM, the Lead or Contact needs to be added as a Campaign Member to that promotional channel campaign.
In a previous blog article we discussed a three-level campaign hierarchy (fig. 4) with promotional channels being at the bottom.
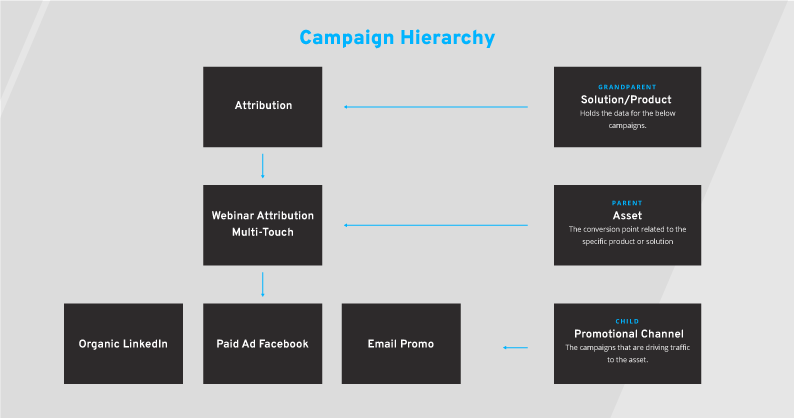
Figure 4, An example of the three-level campaign hierarchy with the Attribution Product at the Grandparent level, the Webinar on Multi-touch Attribution as the Parent, and the promotional channels, Organic LinkedIn, Paid Facebook, and Promotional Email campaigns as the children.
Using the data that is passed through the hidden fields on the form, and configuring some automation, prospects can be added as campaign members at both the Parent or Asset level and the Child or Promotional Channel level. It is important for marketers to understand the channels that are working along with the campaigns that are driving the most conversions.
Referring back to Figure 1, the link will have the Salesforce campaign ID and the member status.

Build Your Campaign Hierarchy for
Attribution Reporting
Automation can then be set up in Salesforce to associate the lead or contact with the correct promotional channel campaign using the Campaign ID and add them as a Campaign Member with their recorded status from the link.
The benefit of using the link method is that marketers only have to use one form for their parent campaign and can then capture data from multiple promotional channel campaigns.
If a team was doing a webinar on Sales Forecasting for Revenue Growth they would create one form with their hidden fields for people to register to, and then no matter what promotional channel the prospect is coming from, their source data will be captured. Oftentimes marketers put in more work than they have to and try to create multiple forms, one for each promotional channel when it is not necessary.
In addition to configuring automation to add the prospect as a campaign member to the correct promotional channel, they also need to be added as a campaign member for the campaign associated with the form, so that there is still attribution for the webinar.
For Marketing Cloud Account Engagement (Pardot), this can be done with a completion action on the form, “Add to CRM Campaign”. For HubSpot this can be done with a Workflow action, “Set Salesforce Campaign”. For Marketo it would be “Add to SFDC Campaign” under your Marketo campaign or as a single flow step. No matter what marketing automation platform you use, be sure you are taking the steps to add prospects that submit to your form as campaign members in Salesforce, so that influenced revenue can be properly attributed back to the campaigns they have engaged with, when they are added as Contact Roles on Opportunities.
Better Lead Source Tracking for Better Budget Spending
The recommended best practice to capture a lead or contact’s true source is to use UTM parameters with links to pass promotional channel data through hidden fields on your forms as cookie tracking is being phased out. Automation should then be configured to automatically update the Lead Source field and add prospects as Campaign Members to their respective campaigns for both the promotional channel and the conversion point.
Without putting proper systems in place, marketers will continue to invest their budget into channels that are not getting them results, because they will not be able to objectively answer the question, which campaigns are driving the most influenced revenue? Therefore, take the time to prioritize this, so that your team can understand what is working and what is not and make smarter decisions on where to spend their marketing budget.
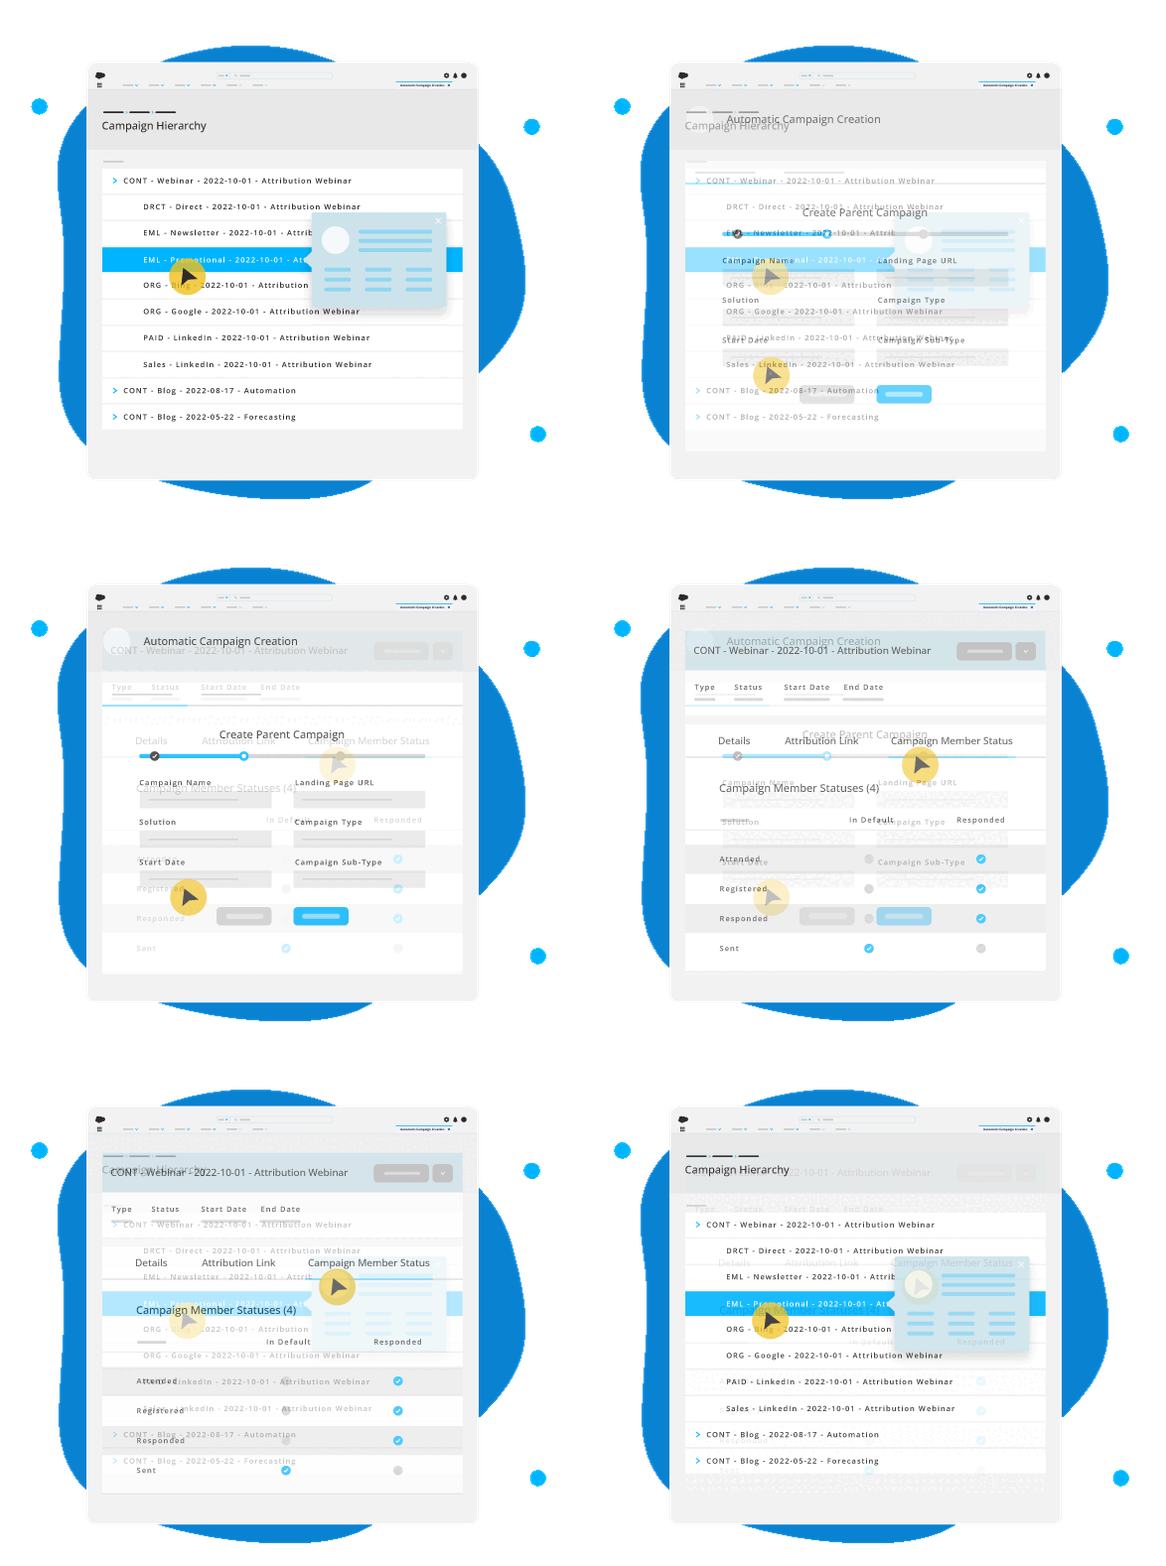
Achieve Channel Attribution with Automated UTM Links

